Windows 10 is finally out and already being praised. In just two days of its release, Windows 10 is downloaded over 14 million times worldwide and still counting. Upgrading a PC running Windows 7 or Windows 8.1 is a fairly simple task thanks to Windows Update, or Windows 10 Download Tool which allows you to run a tool and upgrade to Windows 10. This tool also allows you to create a bootable USB or DVD. You can also make ISO image of Windows 10. This installation media can be used to upgrade other PC to Windows 10 as well as to perform clean installation of Windows 10. In this tutorial, you will learn how to perform clean installation of Windows 10.
What does clean installation mean?
Clean installation means wiping current operating system and installation a new operating system without carrying over your files and settings. Clean installation also means installing operating system on a hard drive which does not have an operating system already.
Why perform a clean installation?
The free upgrade of Windows 10 is available to users who are running Windows 7 or Windows 8.1 with genuine keys. If you are running older version of Windows like Windows XP or Windows Vista, if you are running other OS such as Linux on your PC and want to wipe it and use Windows 10, or your PC simply does not have an operating system, you will have to perform a clean installation of Windows 10. In all these cases, you will have to purchase a key for Windows 10 and use it during installation.
How to perform clean install of Windows 10?
Step 1
Download Windows 10 tool which allows you to download Windows 10 and create an ISO or a bootable USB or DVD. Click here to download Windows 10 tool.
Step 2
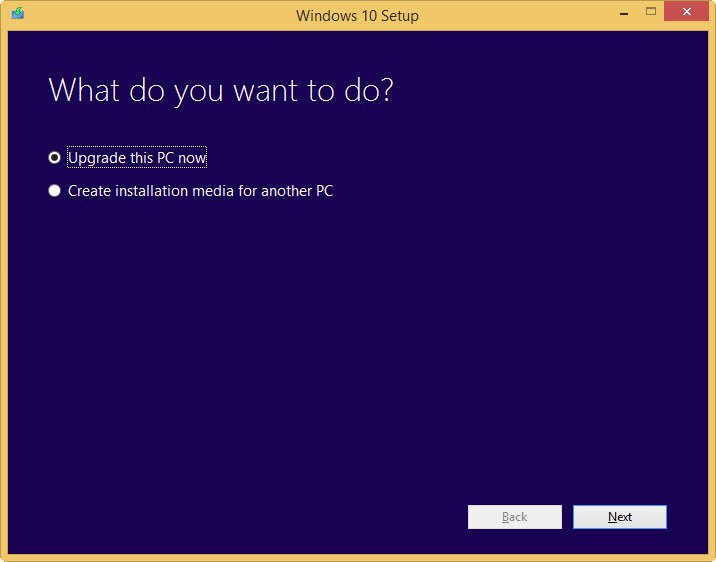
Run the Windows 10 tool and select Create installation media for another PC. Click Next.
Step 3
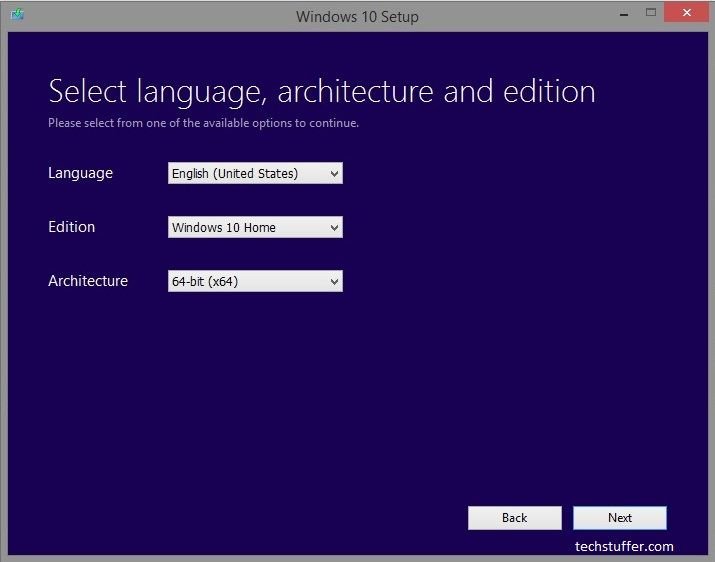
Select language, edition and architecture you would like to have on your PC. Click Next.
Have a look at the following table to know which Windows 7 or Windows 8.1 edition can be upgraded to which edition of Windows 10 if you are going to perform a Windows 10 installation on a PC which is running genuine Windows 7 or Windows 8.1. In all other cases, you will need to buy a Windows 10 key in order to activate your copy after installation.

Step 4
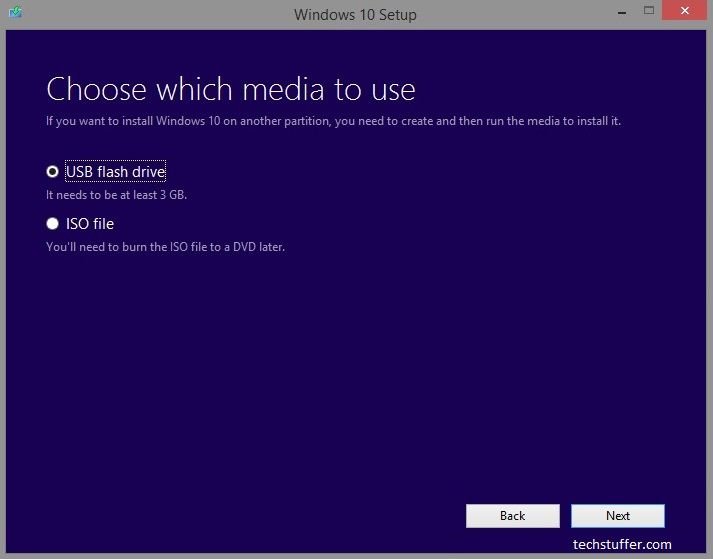
Choose whether you want to create a bootable USB flash drive or you want to create an ISO file and click Next. USB drive must have at least 4 GB free space.
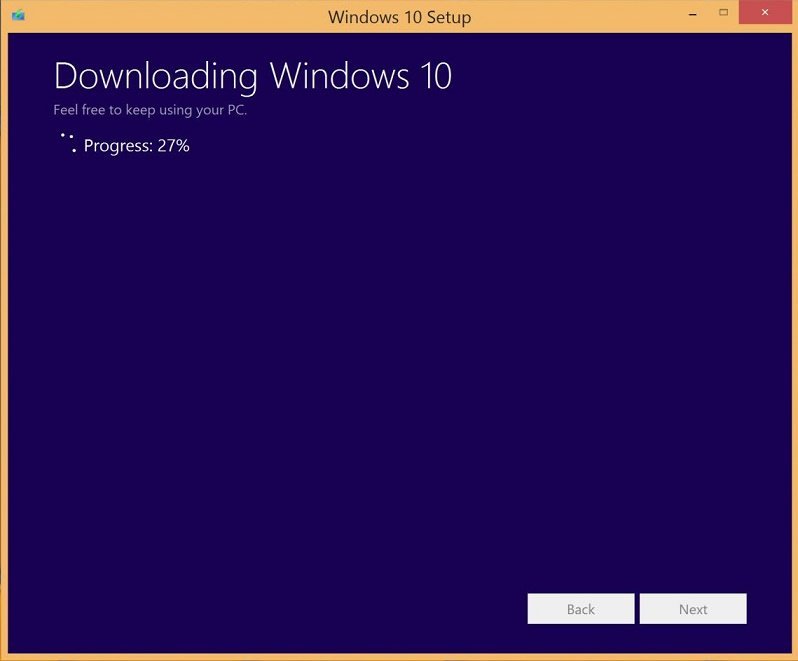
Windows 10 media creation tool will now start downloading Windows 10 files which are about 3 GB in size. You can continue using your PC during the process.
Step 5
After Windows 10 media creation tool finishes up creating your Windows 10 installation media, you can use it to perform a clean installation of Windows 10. Before proceeding, make sure if you are going to perform clean installation on a PC which has genuine Windows license or on a PC which does not have an OS. In first case, follow Step 5A and then follow Step 5B. In latter case, skip Step 5A and follow Step 5B.
Step 5A: Performing clean instillation on a PC which already have a genuine Windows license.
Note: In order to upgrade your Windows 7 or 8.1 license to Windows 10 license for free, you must first upgrade to Windows 10. After you upgrade to Windows 10 and activate, you can follow Step 5B to perform a clean installation of Windows 10.
After creating installation media, insert that media to your Windows 7 or 8.1 PC and run setup.exe from it. In case of ISO file, mount that ISO file and run setup.exe. Follow the upgrade wizard. After the upgrade is finished, follow Step 5B.
Step 5B: Performing clean installation of Windows 10
Boot your PC using the Windows 10 installation media you created. Follow the steps in installation wizard,
B1: On the Install Windows page, enter your language and other preferences, and then select Next.
Select Install Windows.
B2: On the product key page, enter your product key.
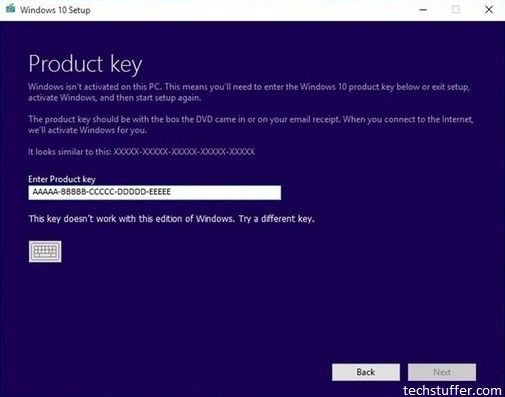
B3: Accept license agreement and click next.
B4: On the Which type of installation do you want? page, select Custom.
B5: On the Where do you want to install Windows? page, select the partition that you want, select the formatting option you want to perform (if needed), and then follow the instructions.
When you’ve finished formatting, select Next.
B6: Follow the rest of the setup instructions to finish installing Windows.
That’s it. You have performed clean installation of Windows 10 successfully.
Likes this tutorial? Share it with others. Didn’t like it? Feel free to contact us and leave your feedback.
Support Me: If this article/tutorial helped you today, please consider supporting me and help me run frunction.com