
There are several occasions when you might receive an error like ‘Fatal Error: Allowed memory size of xxxxxx bytes exhausted’. What this error simply means is that the memory allocated to PHP has reached its maximum limit. Other cases might include a WordPress installation. Where a certain plugin requires more memory and asks you to increase PHP memory limit. In this tutorial, I will show you how to increase PHP memory limit on your server.
How to check current memory allocated to PHP?
Before increasing memory limit, you might want to check how much memory is currently allocated to PHP. On a WordPress installation, the plugin asking you to increase memory may display the current memory and recommended memory size. In other cases, the current PHP limit can be identified using the following method.
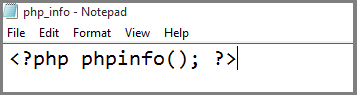
Create a new PHP file named php_info.php (any name can be used) on your computer with the following code in it. This file can be created in any simple text editor such as Notepad. After inserting the code, save the file as php_info.php.
Upload the file you created to the root of your server. It can be uploaded to any sub-directory of your choice.
After uploading the file, access it via a web browser. If you uploaded to root directory, it can be accessed via www.yoursite.com/php_info.php.
In the output, look for memory_limit. It will show the current memory allocated to PHP. In the following screenshot, you can see the memory_limit set to 128 MB.

After you identify the current memory allocated to PHP, you can increase it as required.
How much memory should be allocated to PHP?
Memory allocated to PHP depends on requirement and is limited by the hosting service provider. For a WordPress installation, 32MB is enough. For Drupal 6, 16MB is minimum requirement and 32MB is recommended. In case you use plugins which require more memory, you should increase it by following methods.
How to increase PHP memory limit?
Method 1: Using php.ini file.
The easiest way to increase memory limit is to edit php.ini file. It should be located in your root directory. If you are not sure where php.ini file is located, you can run php_info.php file again and look for ‘Loaded Configuration File’ which shows the locate of your php.ini file.

Locate the php.ini file and edit it. Search for memory_limit which is shown like the following.
memory_limit = 32M
Change the number as required. In my example I set it to 128M. You can change it as your requirement and memory allocated by your host. For example, from 32M, you can set it to 64M or 128M.
Save the file and run the php_info.php file again in your browser. Search for memory_limit and it should show the memory size as you’ve set.
In case of WordPress installation, you might need to edit the .htaccess file to make PHP settings global (if not done already). To do so, locate the .htaccess file under the same directory as your WordPress installation, add the following line and save it. Where cPanel_USERNAME is your username you use to login to cPanel. If the following line already exists in .htaccess, you do not need to change anything. Follow Method 3 for further steps.
suPHP_ConfigPath /home/cPanel_USERNAME/public_html/
After you are done, follow Method 3 to edit wp-config.php file for further changes.
Method 2: Edit .htaccess file.
In case your hosting provider does not allow you to make changes to php.ini file, you can edit the .htaccess to increase php memory.
Enable ‘Show hidden file’ option and find the .htaccess file in your root directory. If you don’t find one, you can create it. In either case, put the following code in .htaccess file and save it.
php_value memory_limit 128M;
Method 3: Edit wp-config.php file (For WordPress installations only)
Note: Changing memory limit via Method 3 will affect your WordPress installation only. It will not change the PHP memory limit globally for other PHP scripts.
You can edit wp-config.php file to increase memory given to PHP in WordPress installation. To do so, locate your wp-config.php file under the root directory of your WordPress installation and edit it. Add the following code in the file before
/** Sets up WordPress vars and included files. */ and save it. Remember to change 128M according to your requirement.
define( ‘WP_MEMORY_LIMIT’, ‘128M’ );
That’s it. You have increased the memory given to PHP. If you found this tutorial helpful, share it with others. You can follow Tech Stuffer on Twitter and Google+. You can follow me on Flipboard for cool magazines I have created.
Support Me: If this article/tutorial helped you today, please consider supporting me and help me run frunction.com