Introduced first with macOS El Capitan, System Integrity Protection is designed to protect a Mac from malicious software. According to Apple, System Integrity Protection or SIP works by restricting the ‘root’ user account and limits the actions that the root user can perform on protected parts of the macOS.
Before System Integrity Protection became a part of macOS, an app would be given root-level (read: unrestricted) access when it asks user for password. After obtaining unrestricted access this way, an app could modify any system file which means a malware can be planted by a rogue app. By introducing SIP, Apple required all kernel extensions to be signed meaning modified, unsigned extensions would not work. By disabling SIP, you might also be able to run ‘damaged’ apps on your M1-powered Mac.
System Integrity Protection is enabled by default in all macOS versions since El Capitan, including the new macOS Big Sur. Its status can not be changed without entering recovery mode but it’s not impossible to do so. In this quick tutorial, I share how to disable SIP on latest Macs powered by Apple Silicon M1 and M2 processors.
Step 1: Entering Recovery Mode
Usually you would press Command + R while booting up a Mac to enter recovery mode. In Macs with M1 and M2 chips, there’s a slight difference here.
To enter recovery mode, shut it down first. Then press and hold the power button. You should hear the chime sound and see Apple logo. Below the logo it should say ‘Continue holding for startup options.’
Release the button once it says ‘Loading startup options.’
Now you will see two options: Your macOS HD and Options. Select Options, click Continue. Select an administrator account and enter its password.
Your Mac is now in recovery mode.
Step 2: Disabling System Integrity Protection
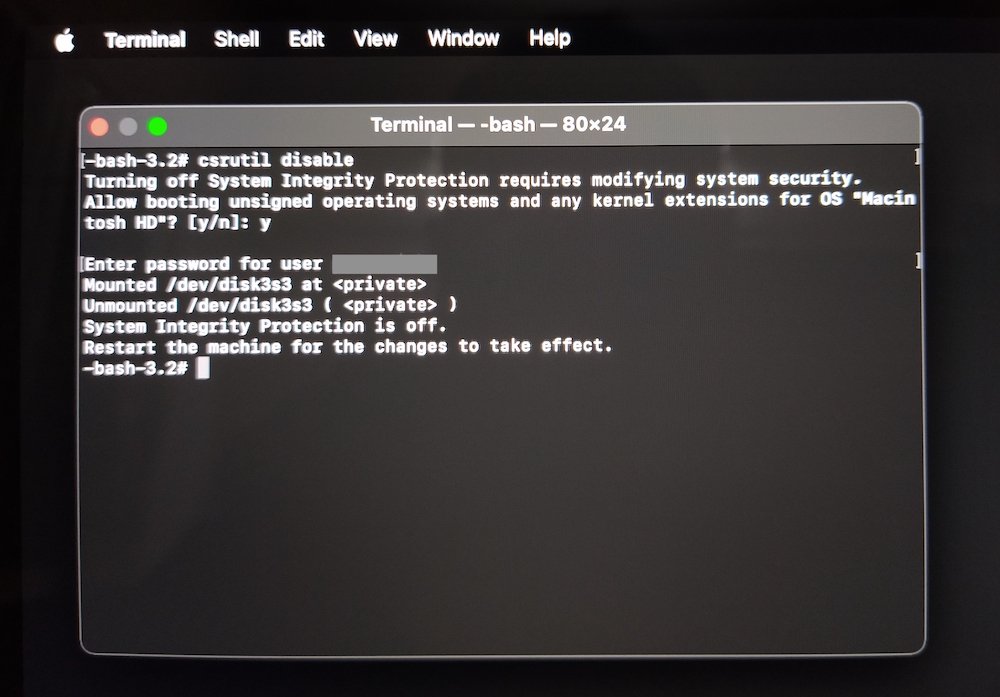
Open Terminal from Utilities menu and enter the following command.
csrutil disable
Type y, press return key and enter your password. Terminal should confirm that SIP is disable.

Type reboot and press return to reboot your Mac.
Disabling SIP on Apple Silicon (M1) Macs: Summary
It’s not impossible to disable System Integrity Protection on new Macs powered by Apple Silicons. You need to enter macOS recovery mode and run a simple command to do so.
Remember that by disabling SIP, you are leaving you Mac vulnerable to malwares. With SIP disable, an app can obtain unrestricted access by asking you for your password. Make sure you trust the app before doing so.
Once you are done tinkering around, you should enable System Integrity Protection again. Follow Step 1 and 2, only changing the command to csrutil enable in Step 2 to re-enable SIP.
Support Me: If this article/tutorial helped you today, please consider supporting me and help me run frunction.com

