
The latest version for Apple’s desktop and laptop operating system is out now. macOS Sonoma can be easily installed from Settings > General > Software Update as usual. But if you are planning on updating multiple Macs and/or wish to wipe off your Mac and perform a fresh macOS installation, having a bootable installer will save you plenty of time and efforts.
macOS Sonoma, version 14.0, is around 12.4GB so downloading it multiple times for each of your Mac can be a long process. By making a bootable macOS installer on an SD card or flash drive, you can use the same installer on multiple computers without having to download the update multiple times. It also acts as a recovery disk for your Mac, in case you need it in future.
Whatever your reason may be, but in this quick tutorial, I will share how to make a bootable macOS Sonoma installer on a removable media. Remember to back up your data before you begin. Keep your Mac plugged-in during the process.
Step 1: Download macOS Sonoma
Head over to to Settings > General > Software Updates and let your Mac show you the latest macOS update. Click Upgrade Now and let the download begin. Alternatively, you can visit this direct link to start download in case you don’t see the macOS Sonoma update in Settings.
Once the download finishes, the installer should start automatically. Quit the installer by pressing Command + Q.
Step 2: Preparing the Storage Media
Now it’s time to prepare your SD card, thumb drive aka flash drive aka pen drive. Make sure you don’t have any important data on the storage media as you will be erasing it. Choose a media with at least 16GB space. I am using a 64GB SanDisk SD card on my M1 MacBook Pro, connected using a HyperDrive USB-C hub.
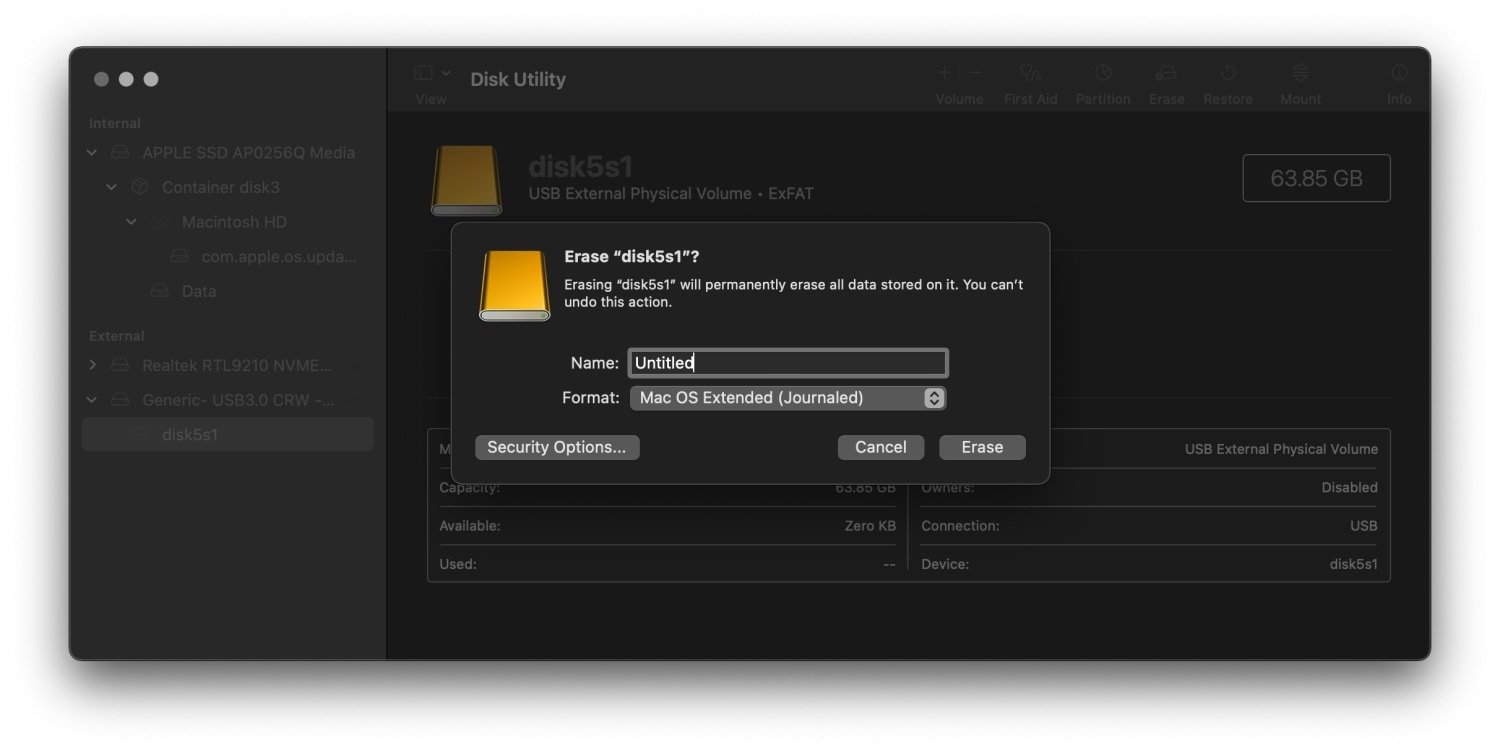
Open Disk Utility.
Select the storage medium you just connected from the left pane and click Erase. Select Mac OS Extended (Journaled) from Format dropdown. Name the media as Untitled or Sonoma or any other name easy to type. Keep it simple because you will have to type this name in the next step.
Click Erase and wait until the media is erased.
Step 3: Making the Bootable Installer
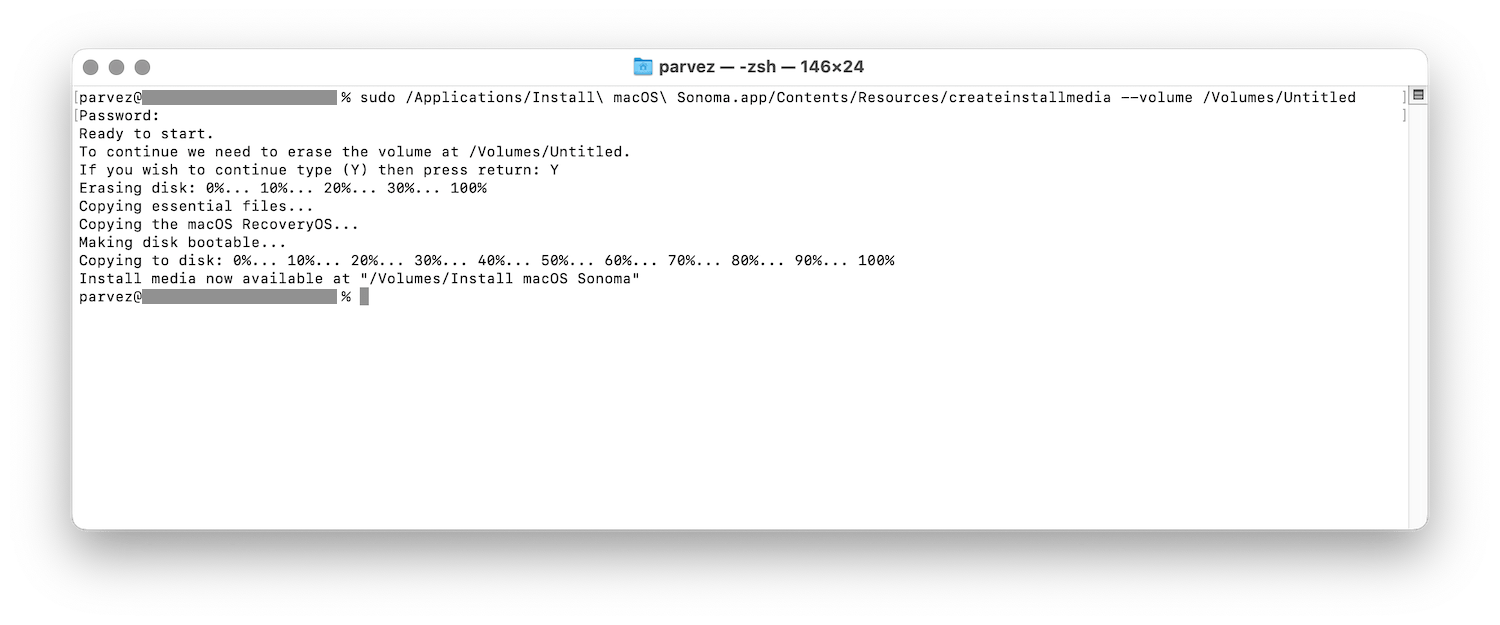
Open Terminal and type the following command. Make sure you don’t leave any spaces.Note that there are two dashes before volume. Replace Untitled with whatever name you chose in Step 2.
sudo /Applications/Install\ macOS\ Sonoma.app/Contents/Resources/createinstallmedia --volume /Volumes/Untitled
Press return.
Enter your password, type Y and press return again. The process should take roughly 20 minutes. After it’s finished, you will notice that the name of your removable media has been changed to Install macOS Sonoma.
That’s all. You now have a bootable macOS Sonoma installer on a removable media such as an SD card or USB thumb drive.
Installing macOS Sonoma Using the Bootable Medium
To upgrade your Mac with Apple Silicon processor to macOS Sonoma using the bootable media, shut down your Mac. Once it’s shut down, press and hold the power button. Your Mac should start and you should see Continue holding for startup options. Release the power button once you see Loading startup options.
On an Intel Mac, press and hold Command + R while it’s booting up.
You should see three options – the disk containing your current macOS installation, your bootable media named Install macOS Sonoma, and Options. Choose Install macOS Sonoma and continue. Follow the on-screen process.
Your Mac may restart a few times during the installation.
Support Me: If this article/tutorial helped you today, please consider supporting me and help me run frunction.com