
“Your sites are down.” My website monitoring tool started giving me this alert frequently last month. I tried to look for reasons — I checked plugins and theme, nothing had changed there and disabling them did not produce any immediate results. Page views were not more than 500 per day and no temporary spike in the traffic. I wasn’t using too much bandwidth or storage even though they are ‘unlimited.’ My databases were optimised, no cron-jobs or scripts that would use too many resources either. WordPress heartbeat was disabled as well.
When I could no longer figure out what was causing frequent error 500, I contacted DreamHost for help. I was told my sites were using too many resources and that I should move to a VPS for better performance. This started the same month as the expiry of my yearly plan and I though it was now a good idea to try a VPS because I had been thinking about doing so for the last few months anyway. The plan was to try a few options and if there was no benefit observed or if things didn’t go as expected, I would stay with DreamHost.
After fiddling around for nearly three weeks, I had moved my WordPress sites to a VPS cloud. The benefits included better performance, control of my own server, being able to use my (limited) knowledge of Linux and learn more as I go. But because I have to take care of my server, it becomes more frustrating — especially in the beginning — because it takes time to learn things and test them. Sometimes things don’t go as expected and you have to start again.
But now I can say that it was a good decision to move my sites to a VPS. Everything is setup as I wanted to — my WordPress sites, emails, link-shortening, NextCloud — all worked out, after dealing with a lot of frustration, of course. In this tutorial, I will share how I moved my WordPress sites from shared hosting to a VPS. Other tutorials about setting up emails, spam filtering, installing NextCloud etc. will follow.
My Setup:
- 3 WordPress sites with around 500 daily page views.
- 20 active plugins on each website.
- YOURLS link shortening for each website.
- 10 databases.
- 15 emails.
- Subdomain for each website to serve images from.
- 1 NextCloud instance.
- Shared hosting (migrating from): DreamHost
- VPS provider (migrating to): Linode.
- VPS operating system: CentOS 7.
- Control panel: CyberPanel.
- Web server: OpenLiteSpeed.
Moving WordPress Sites from Shared Hosting to VPS
Step 1: Backup
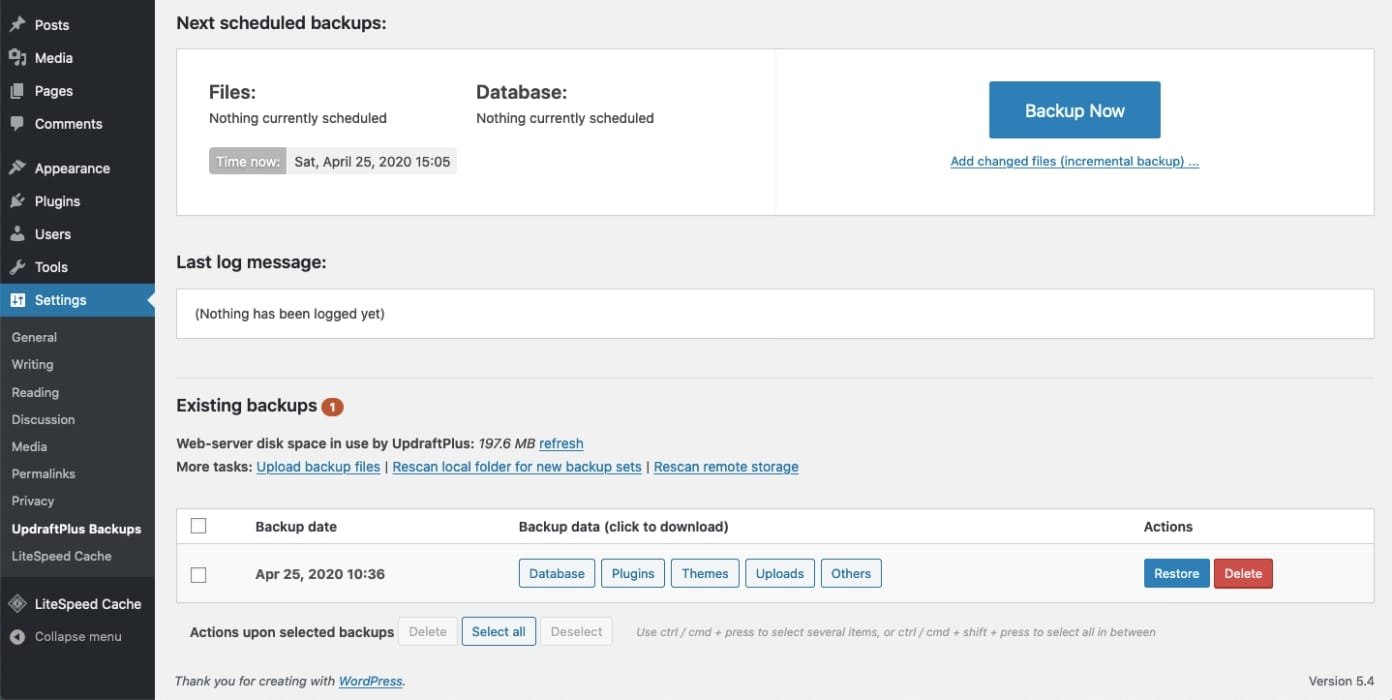
The first thing I did was to backup all my WordPress sites. I use Updraft Plus plugin which lets me backup remotely on clouds like Google Drive, OneDrive, Dropbox, and Amazon among others. After sending backups remotely, I downloaded backup files locally, too. This makes the restore process faster. Uploads, databases, plugins, themes, and ‘other’ files in WordPress directory — everything was included in my backup.

Step 2: Setting Up the VPS
After I had backup, I signed up with Linode which has a 7 days money back policy. While some other VPS providers who restrict some features unless you become a paid member, Linode has no such restrictions — except that they block email ports for all new accounts to prevent spam. If these ports are required, you have to contact them and ask them to be unblocked.
I had shortlisted three VPS providers after thorough comparison. Linode, UpCloud, and Vultr. All three have similar lower tier — $5 gives you 25GB storage, 1GB RAM, and 1TB transfer. I wanted to try UpCloud first but I was unable to create an account. In the end, I signed up with Linode because I like the fact that it’s an independent organisation unlike other companies owned or funded by giant corporations. They have been in business since 2003. Free DDoS protection is included for all customers and trials are not restricted. Their support was responsive when I had trouble activating my account.
After signing up for Linode, I deployed a cloud instance (called ‘Linode’) with CentOS 7, updated the operating system, created a user with root privileges, and disabled root login. Now my server was ready to host websites.
Step 3: Installing CyberPanel:
After the basic setup process, I installed CyberPanel – a free control panel which runs on OpenLiteSpeed. It offers DNS and email manager, Let’s Encrypt support, MariaDB database, PHP 7.4, firewall, FTP, file manager, one-click installers and more. I find CyberPanel extremely fast and easy to get used to. Moreover, DreamHost doesn’t offer HTTP/2 protocol on shared servers. With CyberPanel and LiteSpeed, my sites now benefit from HTTP/2.
Other control panels include VestaCP and Webmin, both of which are also free. Paid control panels like Plesk and cPanel are also available as options. You don’t really need a control panel and manage your server completely from command line, too. But I find a control panel easier to use, especially with multiple websites. Users switching from a shared host are used to control panels like cPanel and while moving to a VPS, they might not want to let go of the ease of a control panel.
To install CyberPanel, I SSH-ed into my new server and run the following command. Then I input 1.
sh <(curl https://cyberpanel.net/install.sh || wget -O - https://cyberpanel.net/install.sh)During the installation process, I selected MariaDB version and input Y to install all extensions.
After installation was finished, I navigated to CyberPanel using the IP address of my server, followed by port 8090 (https://x.x.x.x:8090). My username is admin and password as I chose during installation. If there was no password set, it will be 1234567.
After logging in, I clicked the arrow near “Cyber Pan” then clicked “Edit Profile.” Then I selected the username (admin), entered my first and last name, and entered a new password. Next time, I can login with this new password. And now CyberPanel will show my name on the dashboard.
Step 4: Creating a New Website in CyberPanel
Now that I had a cloud server with CyberPanel installed, I was ready to start setting up my websites one by one. CyberPanel made the whole process smooth.
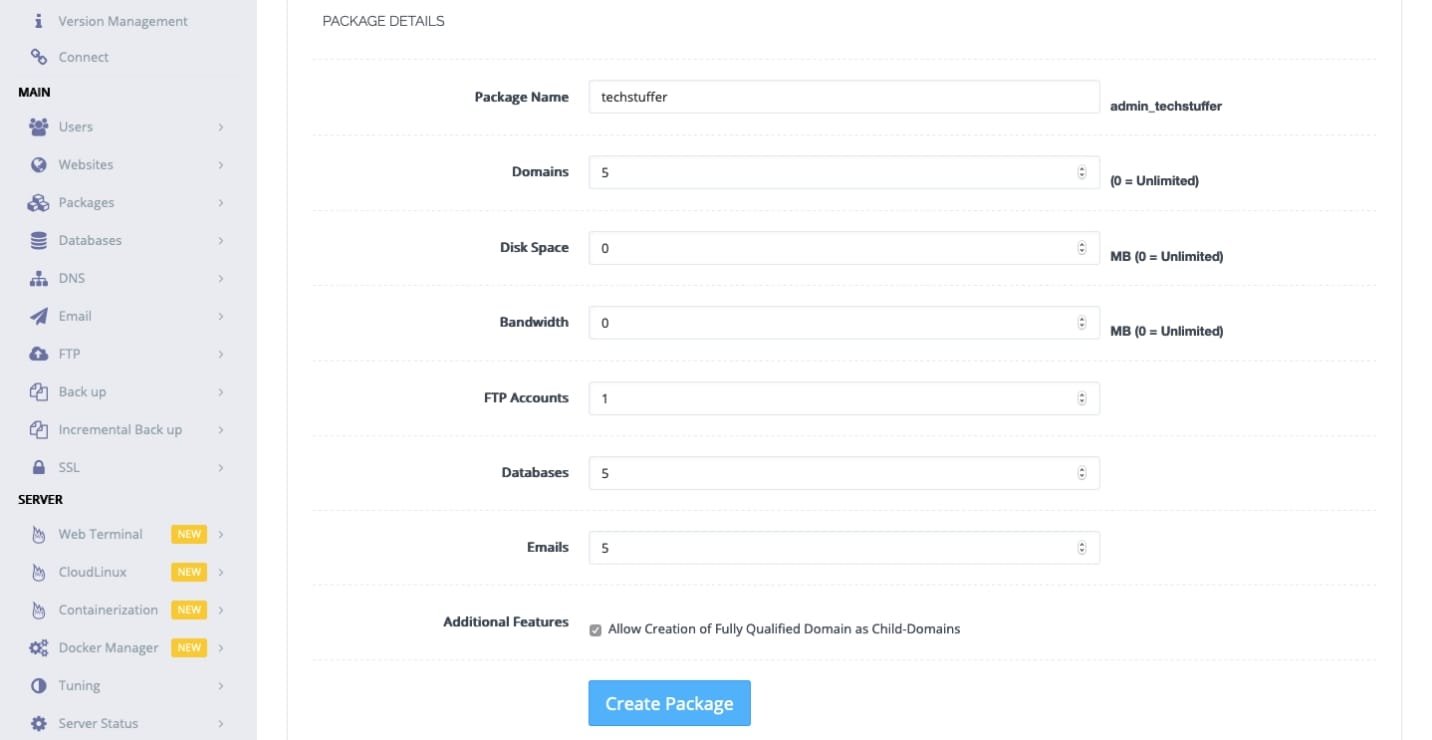
The first thing to do is to create a ‘package’ which defines how much resources are allocated to a website. Websites under a package can’t go beyond the allocated resources like maximum domains, databases, emails, and bandwidth etc. I made different packages for different sites so that they can have different restrictions. All sites can be under one package, too, if you prefer.
After this, I created the first website with my domain name. I selected SSL, DKIM, open_basedir protection, and ‘create mail domain’ options. If you don’t need an email server, you can skip DKIM and mail domain. For best performance, I chose the latest PHP version 7.4. You should choose your current PHP version here unless you want to upgrade to newer version and you know your current setup works with newer PHP version.
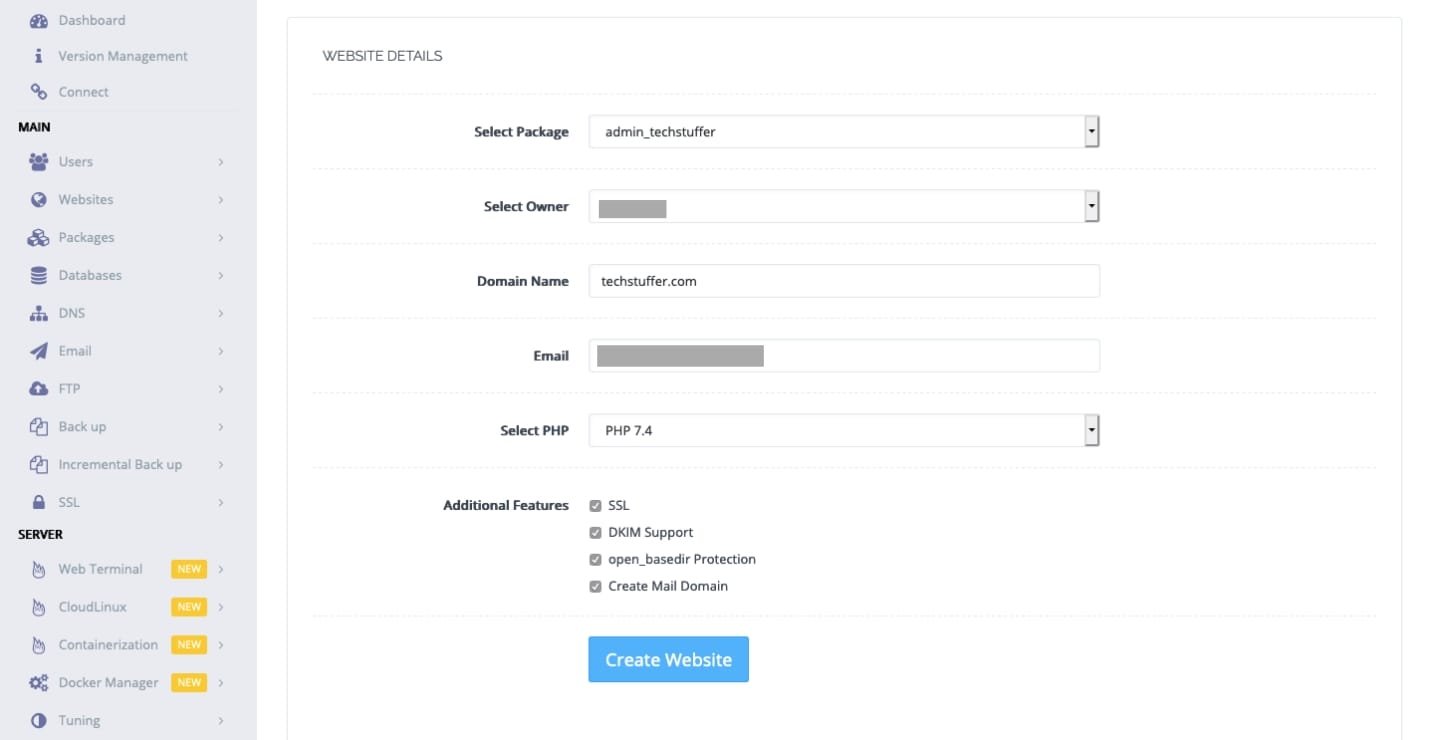
Then I clicked Create Website and a new website was created in a few seconds. Because my domain was not yet pointed to my new sever, CyberPanel issued a self-signed SSL certificate for it. I would deal with this later.
Step 5: Installing WordPress in CyberPanel
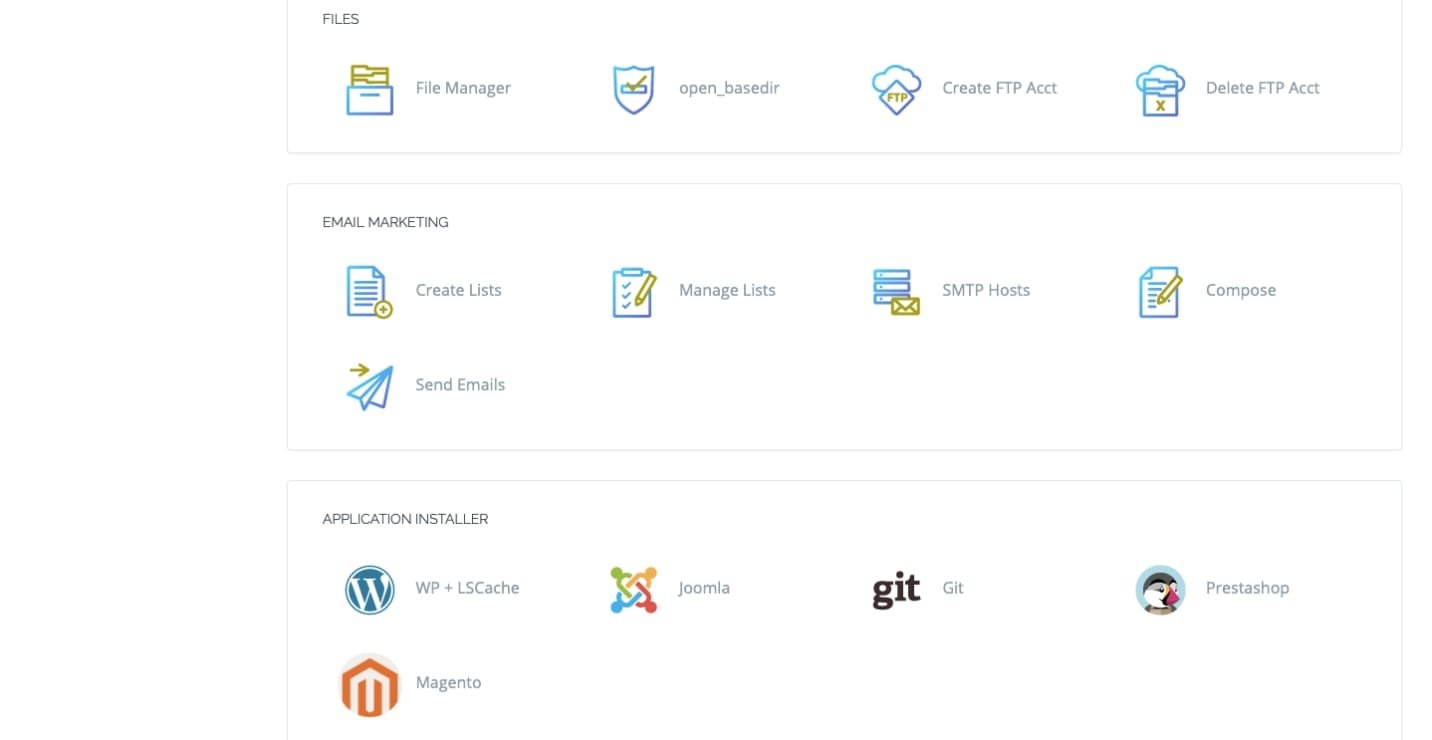
Now that I had the website ready on my server, I could proceed with WordPress installation. CyberPanel has a one-click installer for WordPress which comes with LiteSpeed cache support. Because the sever is running LiteSpeed, my sites will benefit from LiteSpeed Cache plugin which will cache my sites and optimise them for better performance.
While installing WordPress, I kept the directory field empty because I want it to operate from home directory. If your site runs from a subdirectory like mydomain.com/blog then you have to enter /blog here.
Then I clicked Install Now and WordPress was installed within a few seconds.
Then I copied my server IP from Linode and modified the hosts file on my laptop to add the following entry where x.x.x.x is to be replaced by server IP.
x.x.x.x techstuffer.comThis change in Hosts file let me browse my new website setup without changing the server for my domain. My website can continue to operate from the old server.
After modifying the hosts file, I browsed to my domain and saw the default WordPress page. This meant my WordPress site was ready to be restored from backup.
Step 6: Restoring from Backup
I logged into my website with the login details I used in previous step. Then I installed and activated Updraft Plus plugin. Now I used the file manager from CyberPanel to browse to the Updraft directory (public_html/wp_content/updraft) and uploaded all backup files that I downloaded before.
Once these files were uploaded, I went back to the Updraft Plus page in the WordPress dashboard and clicked ‘Rescan local folder for new backup sets.’ This showed me the backup set that I uploaded. I clicked Restore and selected everything — database, plugins, themes, uploads, and ‘other’ — to be restored. Then I clicked next and Updraft was ready to restore. Because the backup files were stored locally, it was quick for the plugin to finish the restore process.
After the restore was complete, I was asked to login again. This time I will have to use the username and password I was using at the time of taking backup. Once I logged in, I could see my plugins and themes were there — activated/deactivated as they were, all my images were present under Media and my website was setup as before. This meant the restore process went as expected.
Although my first WordPress website was now setup as I wanted to, it was not yet live. In order to make it live for the rest of the world, I had to point the DNS records to my new VPS server.
Step 7: Pointing DNS to VPS
I use Namecheap as my domain registrar and my DNS entries were managed by DreamHost. Now I want to use Linode’s DNS manager instead of DreamHost’s. And for that, I went to Linode Cloud Manager > Domains. I created a new domain there and selected ‘insert default records from one of my Linodes.’ Then I selected the Linode I created earlier and clicked Create.
Linode’s DNS manager added some basic DNS records for my domain including A records and MX records. Because I serve images from a subdomain, I added a subdomain A record in Linode’s DNS manager. I also needed email subdomain so I added this entry too.
Now I logged into Namecheap, changed the DNS to Custom DNS, and entered Linode name servers there. I knew that it will take some time before these changes are propagated. To keep an eye on this, I used a DNS checker which checked my domain from different locations around the world. When I saw my new server’s IP in all these locations, I knew I was ready for the next step.
Step 8: Issuing SSL
My website was now almost ready to be served from an all-new VPS from Linode. If anyone tried to visit the website just now, they would see an SSL warning because its old certificate was no longer going to work. To fix this, I logged into the CyberPanel dashboard, navigated to SSL > Manage SSL, selected my domain, and clicked Issue SSL.
Because the DNS entries were propagated, CyberPanel could acquire and setup a Let’s Encrypt certificate successfully. If that was not the case, I would still see the SSL warning.
Step 9: Configuring LiteSpeed Cache
Now that I had my website completely migrated to a VPS, I could play with LiteSpeed Cache plugin to get the most out of my LiteSpeed setup. So I installed and activated the plugin and one by one, I tried different cache and optimisation options before settling down for the set of options that gave me optimal performance.
By using LiteSpeed Cache plugin, I no longer needed Cache Enabler, Remove Google Font Reference, and WP-Optimise plugins because LiteSpeed Cache plugin does it all. In addition, it can compress images, too.
I know that it’s an unrealistic goal to achieve the score of 100 in any of the testing tools — especially Google Pagespeed. I don’t worry about this score because these tools are never going to be totally happy with my setup. So I kept the settings that I found good for my sites.
What Next?
Now it was time to modify the Hosts file on my laptop and remove the entry that I added earlier. After saving this file and navigating to the website, it was now served from my new server. Which meant the whole process of migrating my WordPress website from a shared server to a VPS had been successfully completed.
Because I have multiple websites, I followed the same process for each domain. But for the rest of the websites, I won’t create a new server on Linode because I want all websites to stay on the same server. You can of course have different servers for different websites, too. Because you have a limit on server resources, you have to make sure not to put a lot of burden on the same server.
Having successfully migrated my WordPress websites to a VPS, I could now add subdomains and issue SSL for them, create my link shortening service using YOURLS, create email accounts and migrate old emails to new server, install NextCloud, setup firewall rules and more.
Benefits Observed After Migrating to a VPS
After moving my sites to VPS, I immediately felt the performance boost, especially at the WordPress backend. The time taken to navigate through different sections was decreased noticeably and so was the time to upload and browse images. Regenerating thumbnails for all my images was quicker, too.
On the front end, too, my sites were performing better. I haven’t observed any down time during the last weeks. My scores on Pingdom, GT Metrix, WebPageTest, and Google Pagespeed are also better — mainly due to Litespeed Cache plugin. Because I chose the server to be in Germany instead of the U.S., my FFTB time has increased but I am not bothered too much by it.
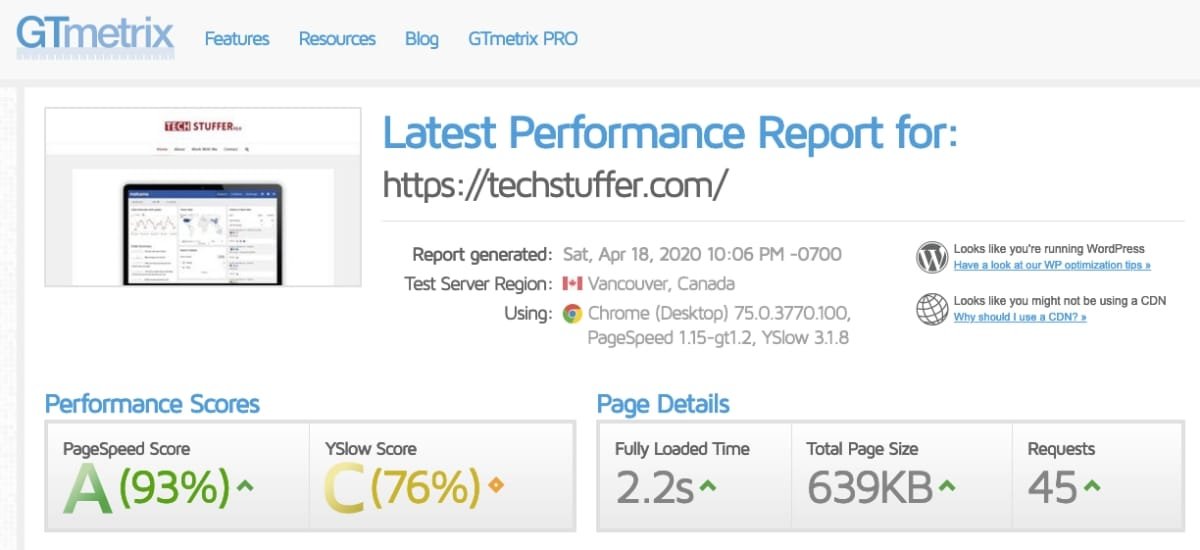
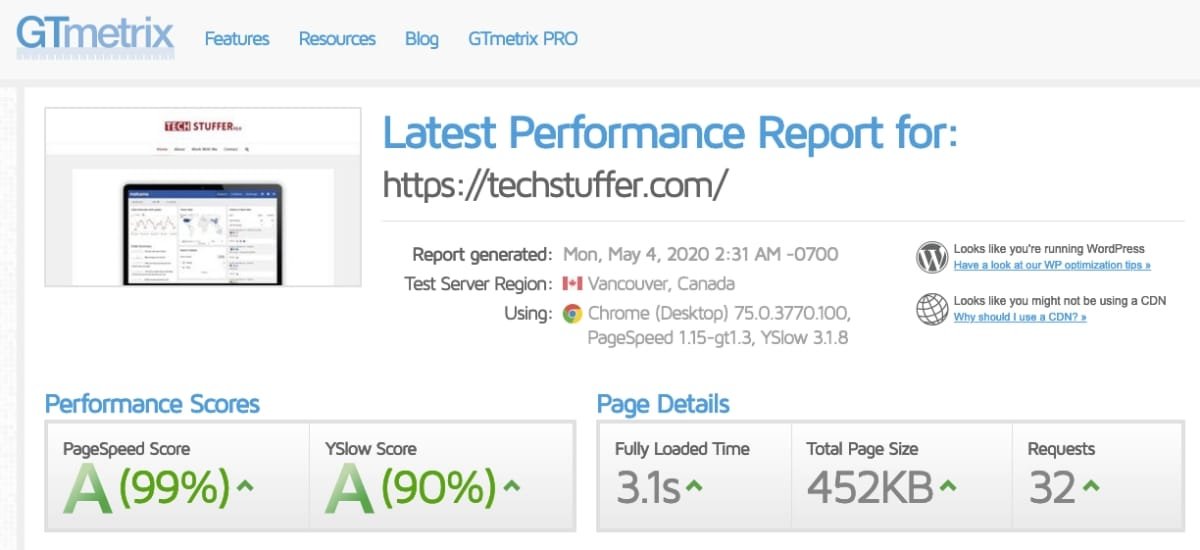
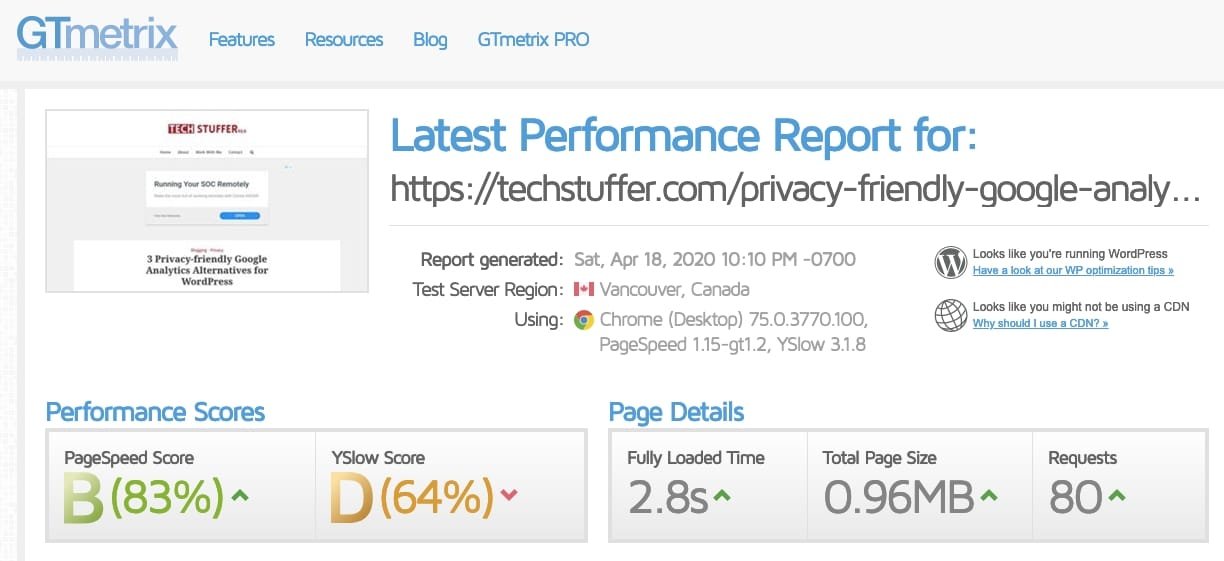
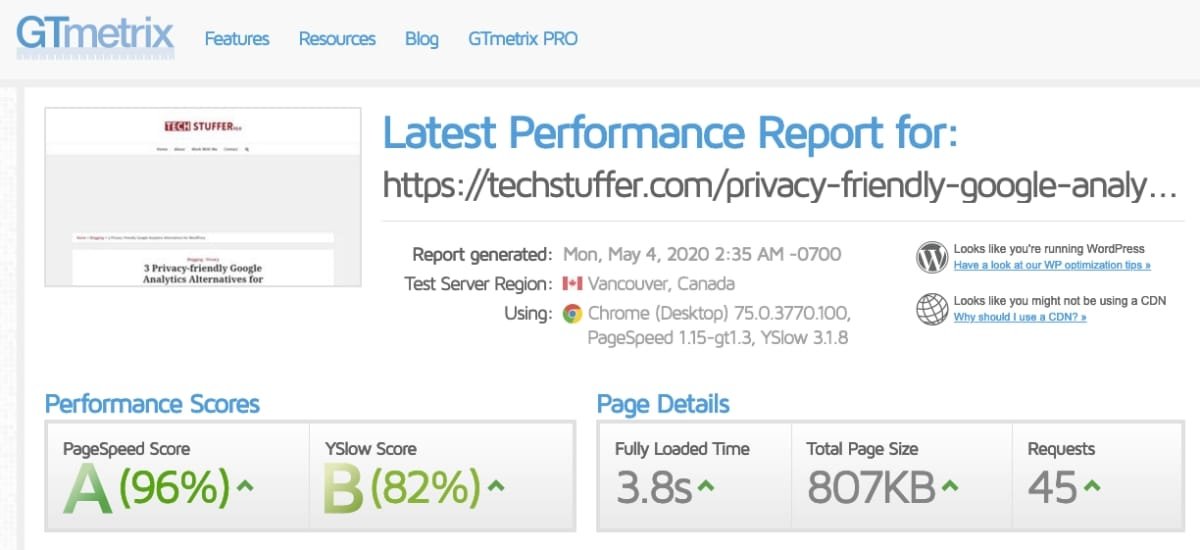
The GT Metrix scores above offer a quick comparison of one of my sites hosted on shared server and VPS. Although there’s a time increase of nearly a second, I love the performance boost because I no longer worry much about the speed. My goals are also being serve well: I am paying less than shared hosting, my sites are not going down as of now, they enjoy performance boost thanks to LiteSpeed and HTTP/2, and I like the whole experience overall.
Having just recently moved my WordPress sites to a VPS, I will have to keep an eye on the performance before I completely ditch DreamHost. If I don’t continue to see better performance, I may stick to shared hosting.
Now, this is not to say shared hosting is a bad choice. It’s still an easy, inexpensive, and reliable way of hosting. I had been thinking of trying out a VPS for a few months but was reluctant because I though it would be very complicated. Now that I finally took the chance to experiment, I know it isn’t really that complicated to move a site to a VPS. I think I will stick to it unless I see a reason to go back.
Cover image by Gerd Altmann on Pixabay.
Support Me: If this article/tutorial helped you today, please consider supporting me and help me run frunction.com