I recently switched from shared hosting to a VPS. I manage my websites, databases, emails etc. using CyberPanel which is a free control panel alternative to the likes of Plesk and cPanel. So far I like the speed and convenience of CyberPanel – which runs on LiteSpeed server, which in turn runs on CentOS 7. While thinking of starting a new project recently, I was looking for WordPress alternatives and decided to try Ghost. I had known about it for a while but never had a chance to try it until now.
Launched in 2013 after a successful Kickstarter campaign, Ghost is an alternative to good-old WordPress. Although relatively newer than WordPress, Ghost is catching up thanks the support of open-source community and frequent updates have made it a serious publishing platform. It counts Mozilla, DuckDuckGo, and Nasa among its users. Like WordPress, it offers a free open-source version which you can install and manage on your own infrastructure.
Although CyberPanel offers one-click install for WordPress, Git, Joomla, Prestashop, and Magento, for other platforms you will have to use Docker. In the absence of straightforward guides focused on Ghost, CyberPanel, Docker, and CentOS 7, I spent two days trying and testing — solving issues that I faced along the way and successfully installed a Ghost instance on a subdomain.
To install Ghost in CyberPanel using Docker, we will install Docker, pull official Ghost image, create a container, and reverse proxy traffic to this container. Nearly all steps will be performed on CyberPanel GUI. After following this tutorial, you will have Ghost running on your domain or subdomain.
Installing Ghost Blogging Platform in CyberPanel
Prerequisites
- A non-root sudo user (optional but recommended).
- CyberPanel already installed.
- A domain or subdomain ‘A record’ in your DNS manager pointing to your server IP.
- Basic comfortability with Linux commands.
My Setup
- A VPS on Upcloud.
- CyberPanel v2.0 running on CentOS 7.
- Three WordPress installations already running.
- Using Docker for the first time (fresh installation).
- Will install Ghost on a subdomain.
Step 1: Add A Domain in CyberPanel
You can choose to install Ghost on a TLD or subdomain. In case of a subdomain, you will first add a domain in CyberPanel and then create a child domain. Skip this step if you already have your desired domain/subdomain added to CyberPanel. My TLD (techstuffer.com) is already added to Cyberpanel. Now I will add a subdomain (ghost.techstuffer.com).
To add a domain in CyberPanel, go to Websites > Create Website. Select package, owner, and PHP version. Enter domain (yourdomain.com) and your email address. Select SSL and click Create Website. In order for CyberPanel to obtain a Let’s Encrypt SSL certificate, the domain must have a working A record in the DNS manager. Without it, your domain will show SSL error because it will have a self-signed certificate.

If you want to run Ghost under a subdomain (sub.yourdomain.com), you should now go to Websites > List Websites. Click Manage in front of the domain name, click Add Domains. Enter sub.yourdomain.com and path. This path should be /home/yourdomain.com/public_html/ghost where ‘ghost’ can be changed to any name of your choice. This directory will be created if it does not exist. Select PHP version, check SSL box and click Create Domain.
You can now visit your domain/subdomain and it should show ‘CyberPanel Installed’ page.
Now that you have a domain and optionally a subdomain running in CyberPanel, you can proceed further.
Step 2: Installing Docker
Login to CyberPanel and go to Docker Manager > Manage Images. If CyberPanel does not have Docker installed, you can click Install Docker. After a few seconds, Docker will be installed and you will be redirected.

Step 3: Pulling Ghost Docker image
On the Manage Images page, type Ghost in Search Image area and it will show a list of images. Look for Ghost with a check mark which means it’s an official image.

Select Latest under Tags and click Pull. It will take a few seconds for Docker to pull the image.
Step 4: Creating a Container
Now go to Docker Manager > Create New Container. You should see the Ghost Docker image that you just pulled is now locally available.
Select Latest under Tags and click Create. It will redirect.
Now select owner, enter memory limit (I entered 512 MB for testing), and enter port 2368 in front of ‘to.’ If, for any reason, you want this port to be different, you can enter that port number. Remember to change this in Step 5, too.
Click Add More and type ‘url’ (without ‘ ‘) in the left box and your domain/subdomain in the right box. I entered https://ghost.techstuffer.com/. This step is crucial because without this, your Ghost instance will redirect you to localhost:2368 — something I spent a day to fix.
Click Add field, enter /var/lib/ghost/content in ‘Destination’ and your domain’s root directory from Step 1 (/home/yourdomain.com/public_html/ghost) in ‘Source’ field.

Click Create Container. It should redirect on success.
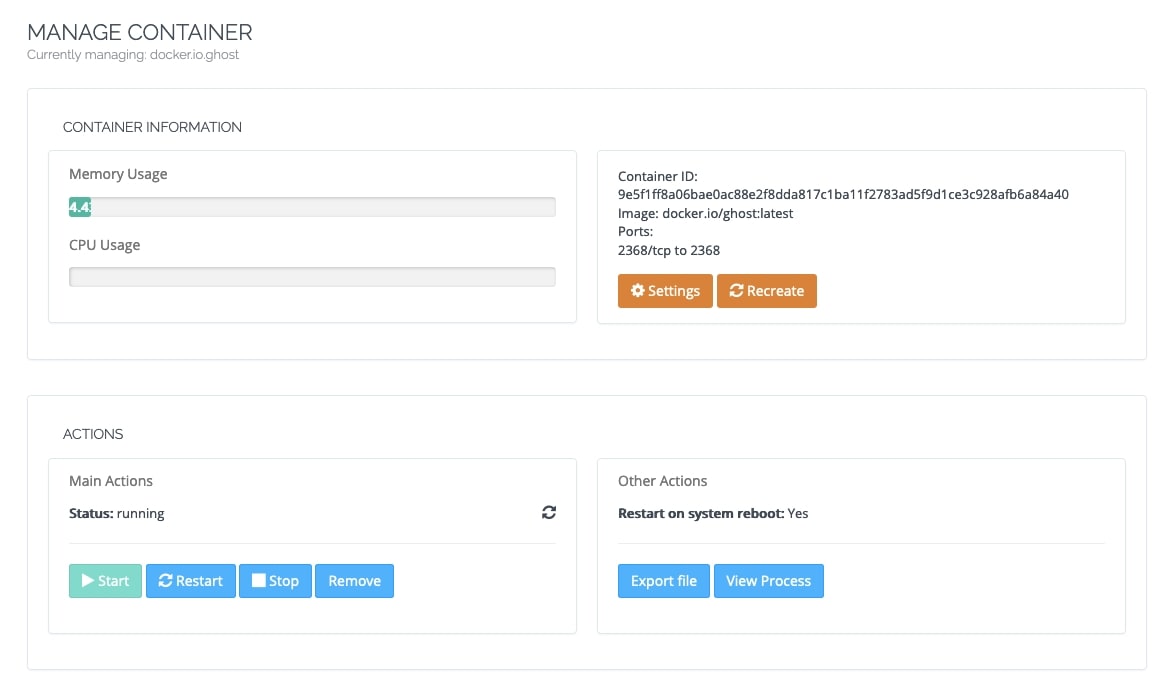
Click Settings, check ‘Start on reboot’ option and save. Start the container by clicking Start and it should show ‘running’ as status.

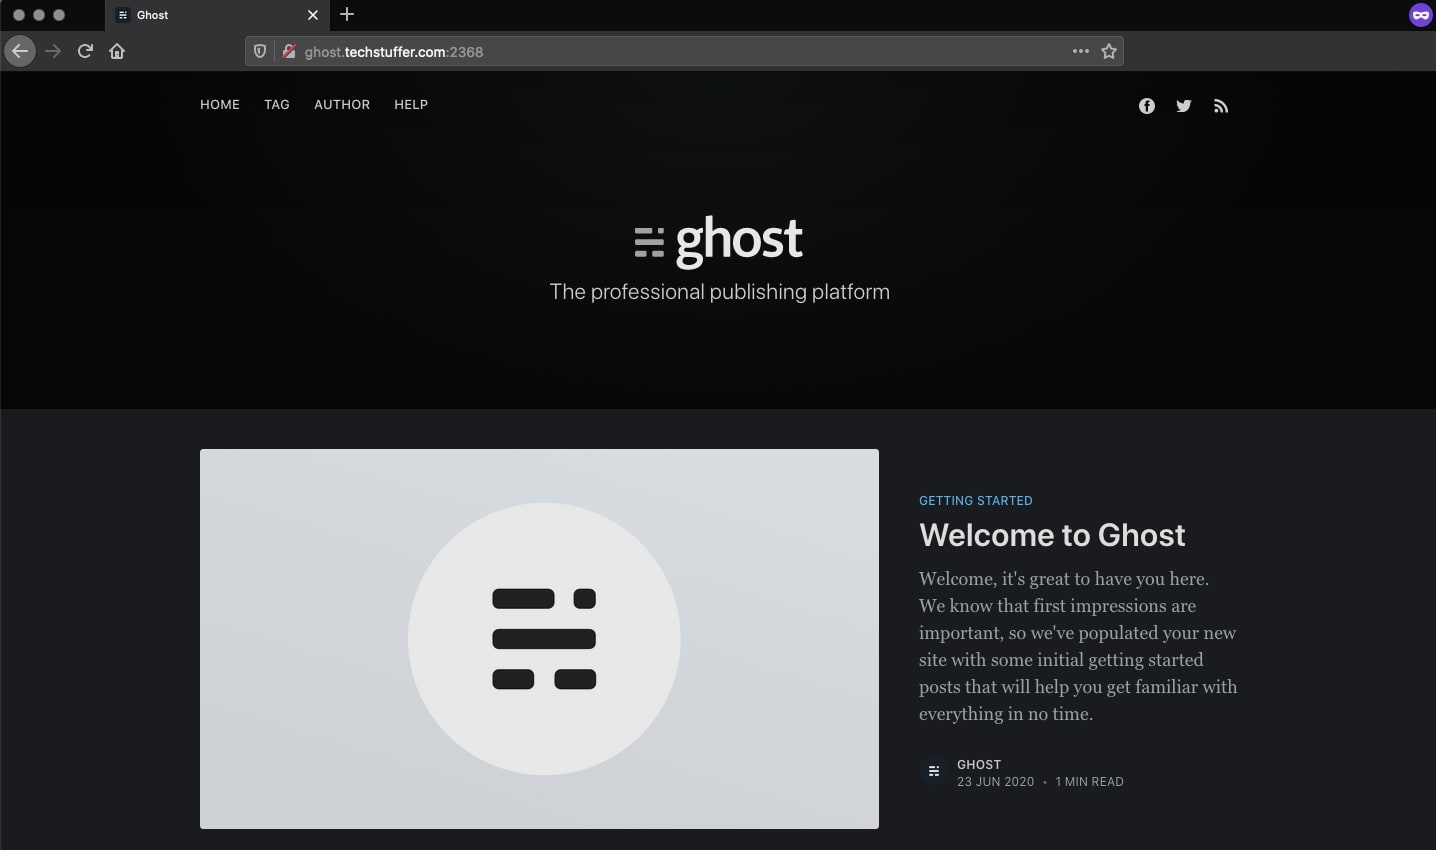
Now visit your Ghost URL with port number attached to it. (mine is https://ghost.techstuffer.com:2368). It should show the default Ghost page, meaning you have installed Ghost.

Step 5: Reverse Proxy Traffic
Now that Ghost is successfully installed and running you should proceed with rewrite rules to proxy traffic to Ghost container. This will allow you to visit your Ghost installation without the port number.
SSH into your server with a non-root sudo user. Run the following command.
sudo vim /usr/local/lsws/conf/httpd_config.conf
Enter password and press i to start editing the file. Paste the following at the end of the file.
extprocessor dockerbackend {

type                    proxy

address                 127.0.0.1:2368

maxConns                100

pcKeepAliveTimeout      60

initTimeout             60

retryTimeout            0

respBuffer              0

}
Press Esc, type :wq and press enter to save changes.
Now open a text editor on your computer and make a blank file. Save it as .htaccess on your desktop. If you can’t see this file, you will have to enable hidden files on your computer. Upload this file to your Ghost installation directory using file manager or FTP. I didn’t see this file after uploading it and had to click Fix Permissions in file manager to fix that.
If your Ghost installation is done on root domain (https://yourwebsite.com), go to CyberPanel > List Websites. If it’s installed on a subdomain, go to CyberPanel > Websites > List Child Domains. Click Manage in front of your domain/subdomain and it should open a new window.
Scroll down, click Rewrite Rules and paste the following. If you do not want to force http requests to https, you should remove the first two lines.
RewriteCond %{HTTPS} !=on
RewriteRule ^ https://%{HTTP_HOST}%{REQUEST_URI} [L,R=301]
REWRITERULE ^(.*)$ http://dockerbackend/$1 [P]
Click Save Rewrite Rules.
After this change, you should be able to use your domain/subdomain to visit your Ghost blog without the port number.

Source of this step: CyberPanel
Step 6: Ghost Initial Setup
After Ghost is running on your domain, you can visit yourdomain.com/ghost and create an admin account. After you are done, you should see the Ghost dashboard. You will receive a welcome email.
Now you are ready to play with themes and integrations as required or publish your first post. You may want to delete default posts, too and start blogging.

Installing Ghost in CyberPanel Using Docker: Summing Up
One of the best things about WordPress is its widespread adoption which makes it very simple to install and get used to – even for first timers. It works on variety of platforms and in order to install it, you don’t need to know a single line of command or code.
Ghost, although a promising WordPress alternative, still lacks this ease. Being focused on blogging and publishing, it should be kept in mind that a blogger isn’t necessarily very tech-savvy to do it on their own. Yes, Ghost itself provides managed hosting and there are hosting providers who support Ghost with one-click installations. One-click installs from VPS providers don’t help if you are already running an instance with other websites and want to install Ghost on your already existing environment like me.
So yes, you don’t have to feel left out if you are using CyberPanel on your VPS running CentOS. You don’t have to build another cloud instance just for Ghost. You can install Ghost along with other websites in CyberPanel using Docker by following this guide.
That’s all, folks. I hope this tutorial was useful. Let me know if it’s missing something or needs improvements.
Support Me: If this article/tutorial helped you today, please consider supporting me and help me run frunction.com