
Nextcloud is an open-source program that lets you build your own cloud storage for free. It’s fairly easy to install and maintain and helps you eliminate the reliance on third-party cloud providers. Moreover, Nextcloud lets you build not just a cloud storage but a complete productivity suite using ‘apps.’
Most shared hosting providers I know don’t allow you to use their ‘unlimited’ storage for data storage purpose. So if you are using Nextcloud, chances are you are running it on a VPS or dedicated server. I have installed it on a $5/month VPS from UpCloud alongside my websites. The drawback is, although VPS are inexpensive, they don’t offer much storage. A $5, 25GB VPS might be enough for basic storage but if you want to increase it, you can do so by attaching an external storage to Nextcloud.
This ‘external’ storage can be an S3-compatible bucket like Blackblaze B2 or Wasabi as well as a third-party cloud provider like pCloud or Icedrive. The benefit of this approach as opposed to buying object storage from your VPS provider is the cost. For instance, Wasabi offers 1TB storage for just $5.99 a month. pCloud, a privacy-friendly cloud provider offers 500GB storage for 5 euros a month.
By attaching external storage to your Nextcloud, you can expand its storage capacity and continue to use it as usual. There’s no need to visit your storage back-end because everything is done through Nextcloud. Optionally, you can encrypt the data on the third-party cloud storage with Nextcloud’s built-in server-side encryption module.
In this quick tutorial, I share how to increase Nextcloud storage using ‘external storage’ app.
Read before you begin
You need a third-party storage provider to attach as external storage. Nextcloud supports S3-compatible buckets, WebDAV, and FTP/SFTP among others. I will demonstrate pCloud (via WebDAV) and Blackblaze B2 (S3-compatible storage).
You need administrator account access to enable external storage on Nextcloud.
This guide does not cover how to install Nextcloud. It’s assumed that Nextcloud is already installed.
For the safety of the data stored on a third-party cloud, we will use server-side encryption module. Encryption comes with compromises like reduced speed and increased file size. If you enable server-side encryption, you will have to upload and view your files through Nextcloud only. It’s optional to enable server-side encryption. Skip Step 2 if you don’t want to enable it.
It’s advised to perform enough testing with an alternate Nextcloud + external storage environment before using it for your primary setup, especially so when using Nextcloud’s server-side encryption.

Extending Nextcloud Storage
Step 1: Login to your Nextcloud instance using administrator account. Go to Apps and search for ‘External storage support.’ Click download and enable.

Step 2 (optional): Search for ‘Default encryption module’ app and enable it. Go to Settings and click Security under Administration section on the left pane. Turn on Server-side encryption, read the notice and click Enable encryption. On the same screen, also enable ‘Encrypt the home storage’ option if you would like to encrypt files on your Nextcloud instance, too.
Performing this step will encrypt files uploaded on your Nextcloud as well as on external storage. Note that files that are already uploaded will remain unencrypted.
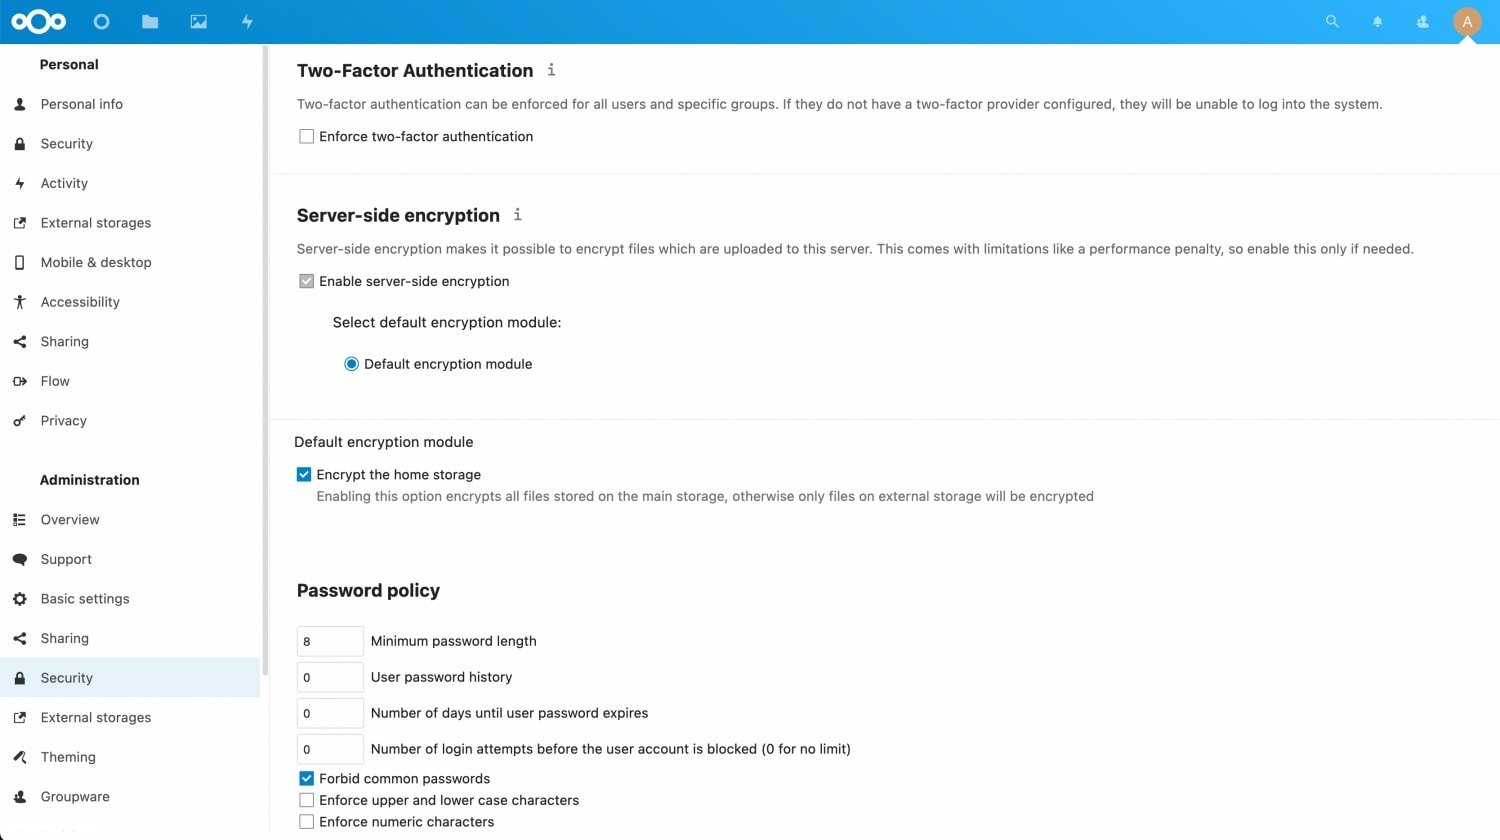
This step is optional but helps encrypting your data if you have trust issues with third-party storage. Only enable it if you have tried it enough and you are okay with the performance. Keep in mind that after enabling this, your encrypted files can only be viewed using Nextcloud.
Step 3: Now click External storages under Administration section on the left pane.
Select your storage type from the Add storage dropdown list. For pCloud, Icedrive or similar cloud storage, I will choose WebDAV. If setting up an Amazon S3 or S3-compatible storage like Wasabi or Blackblaze B2, I will select Amazon S3.
For WebDAV, you need the WebDAV URL for your cloud provider along with your user credentials. For S3, you need bucket name, hostname, port, region, access key and secret key. Refer to your storage provider’s documentation for the same. See the screenshot below to get an idea about how this information looks like once entered.
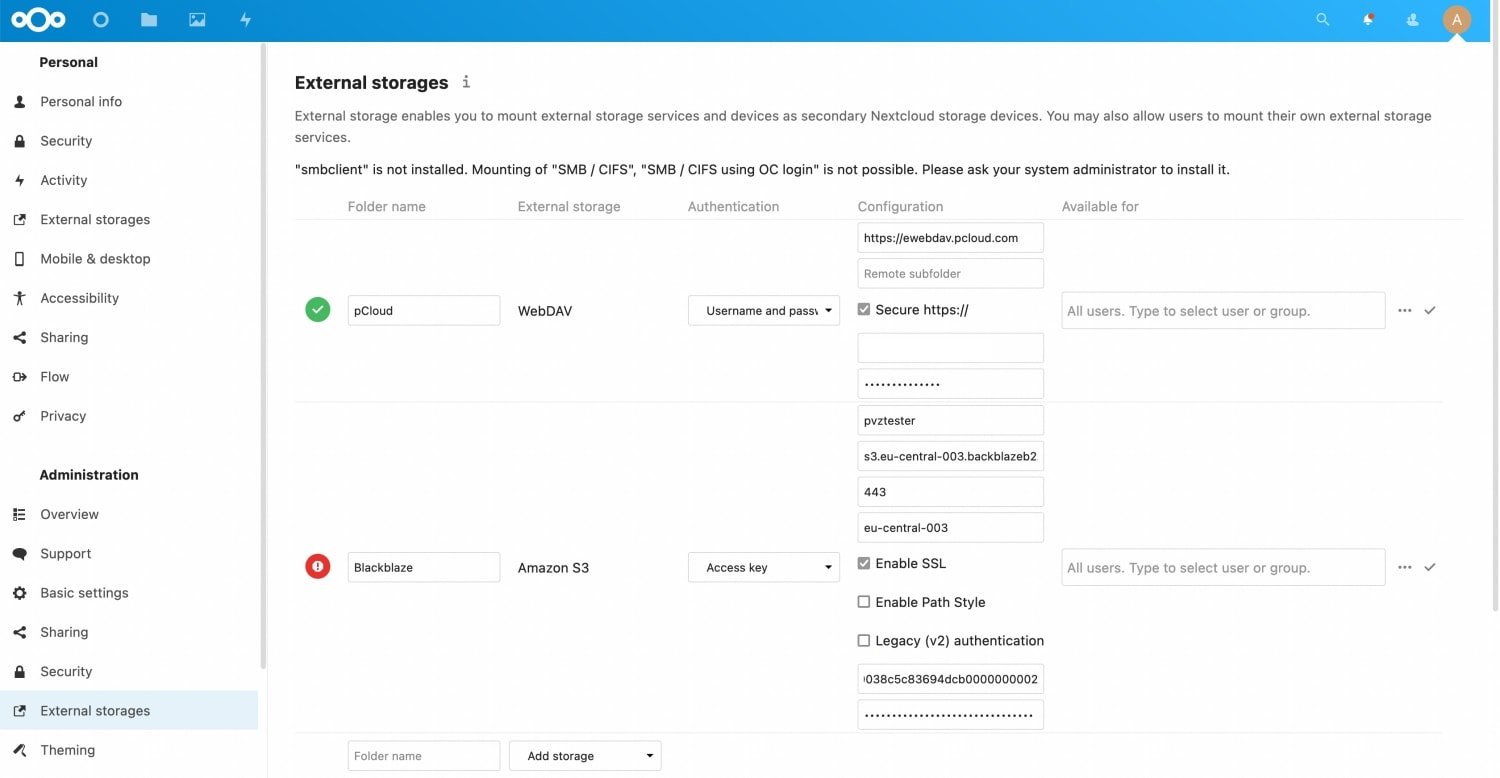
After entering required information, click the check mark icon on the right and Nextcloud will verify the credentials. If it’s successful, a green check mark will appear on the left.
To allow other users on your Nextcloud setup to mount external storage of their choice, you can enable the ‘allow users to mount external storage’ option on the same screen.
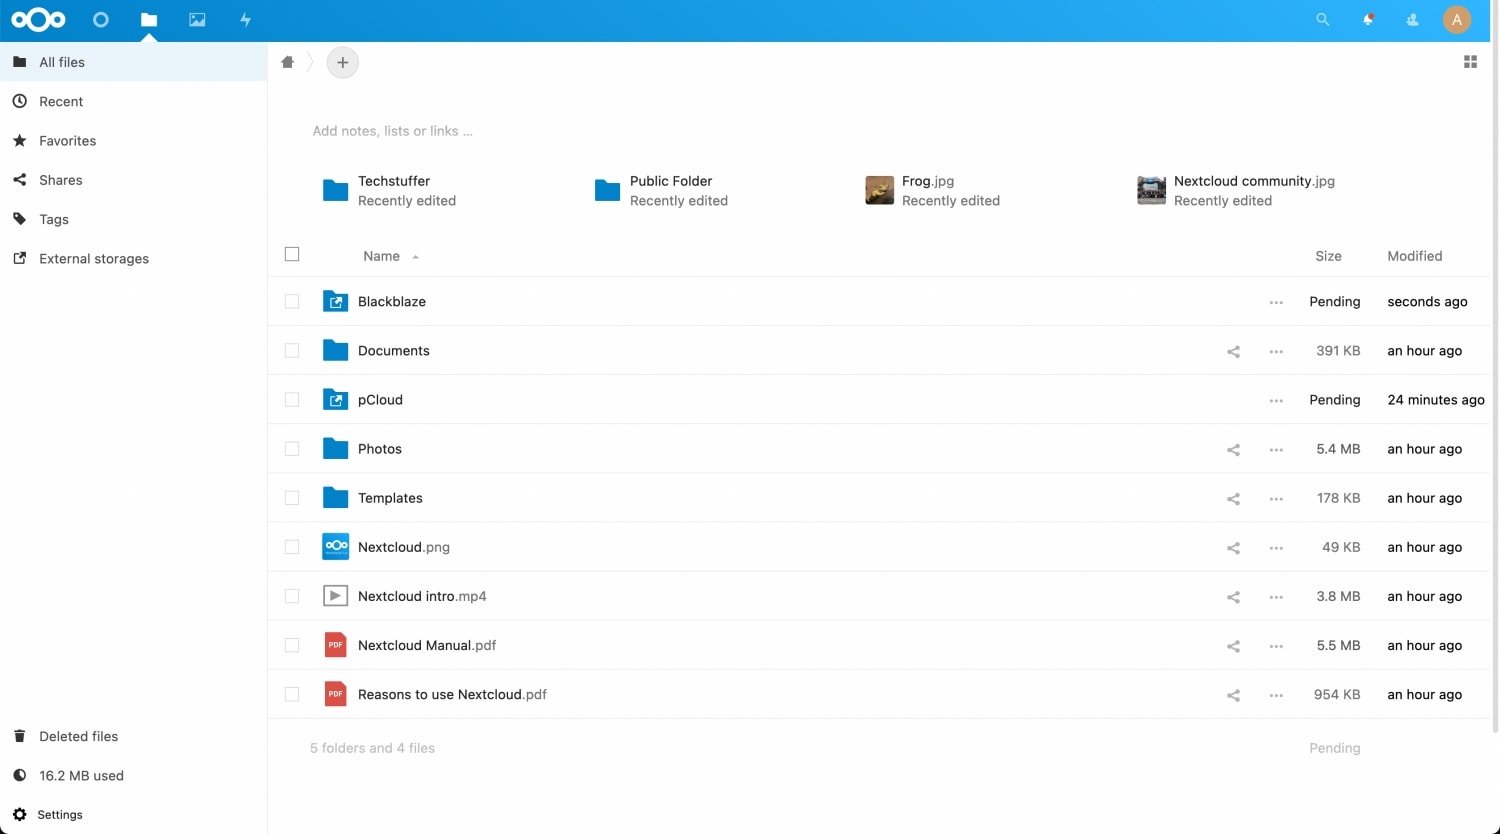
After successfully mounting external storage, you will see them under Files.
Increasing Nextcloud Storage Using External Storage: Summing Up
By adding external storage to your Nextcloud, you can increase its storage space. Nextcloud allows Amazon S3 and S3-comatible storage like Blackblaze or Wasabi, and WebDAV among other external storage options. After adding external storage, you can continue using Nextcloud as usual. You can browse files that you uploaded to external storage in Nextcloud and vice versa.
During the experiment, I found Nextcloud very slow and unreliable while browsing files stored on external storage or uploading content. You can give it a try and see if it works better for you.
This is how I get my own privacy-friendly cloud with Nextcloud hosted on a $5/month VPS – extended to 1TB using a $6/month Wasabi instance. How do you extend your Nextcloud storage?
Support Me: If this article/tutorial helped you today, please consider supporting me and help me run frunction.com